A comprehensive look at infusion equipment and materials
There can be many reasons you need to infuse a compound into a rodent, from preclinical studies of an intravenously administered drug to addiction research. The approach you will take and the equipment you will need will depend on how often you need to dose, how accurate you need the dose to be, and how long each dose will take to deliver. In this guide we will review these approaches and the equipment you will need to dose rats and mice. We will focus on IV infusion, but much of this guide applies to other types of infusion as well, such as subcutaneous, intrathecal and gastric. This guide builds on continuous infusion overview articles written in the early 2000s1,2, updated for equipment advances over the past two decades.
Approaches to IV Dosing
Manual Dosing
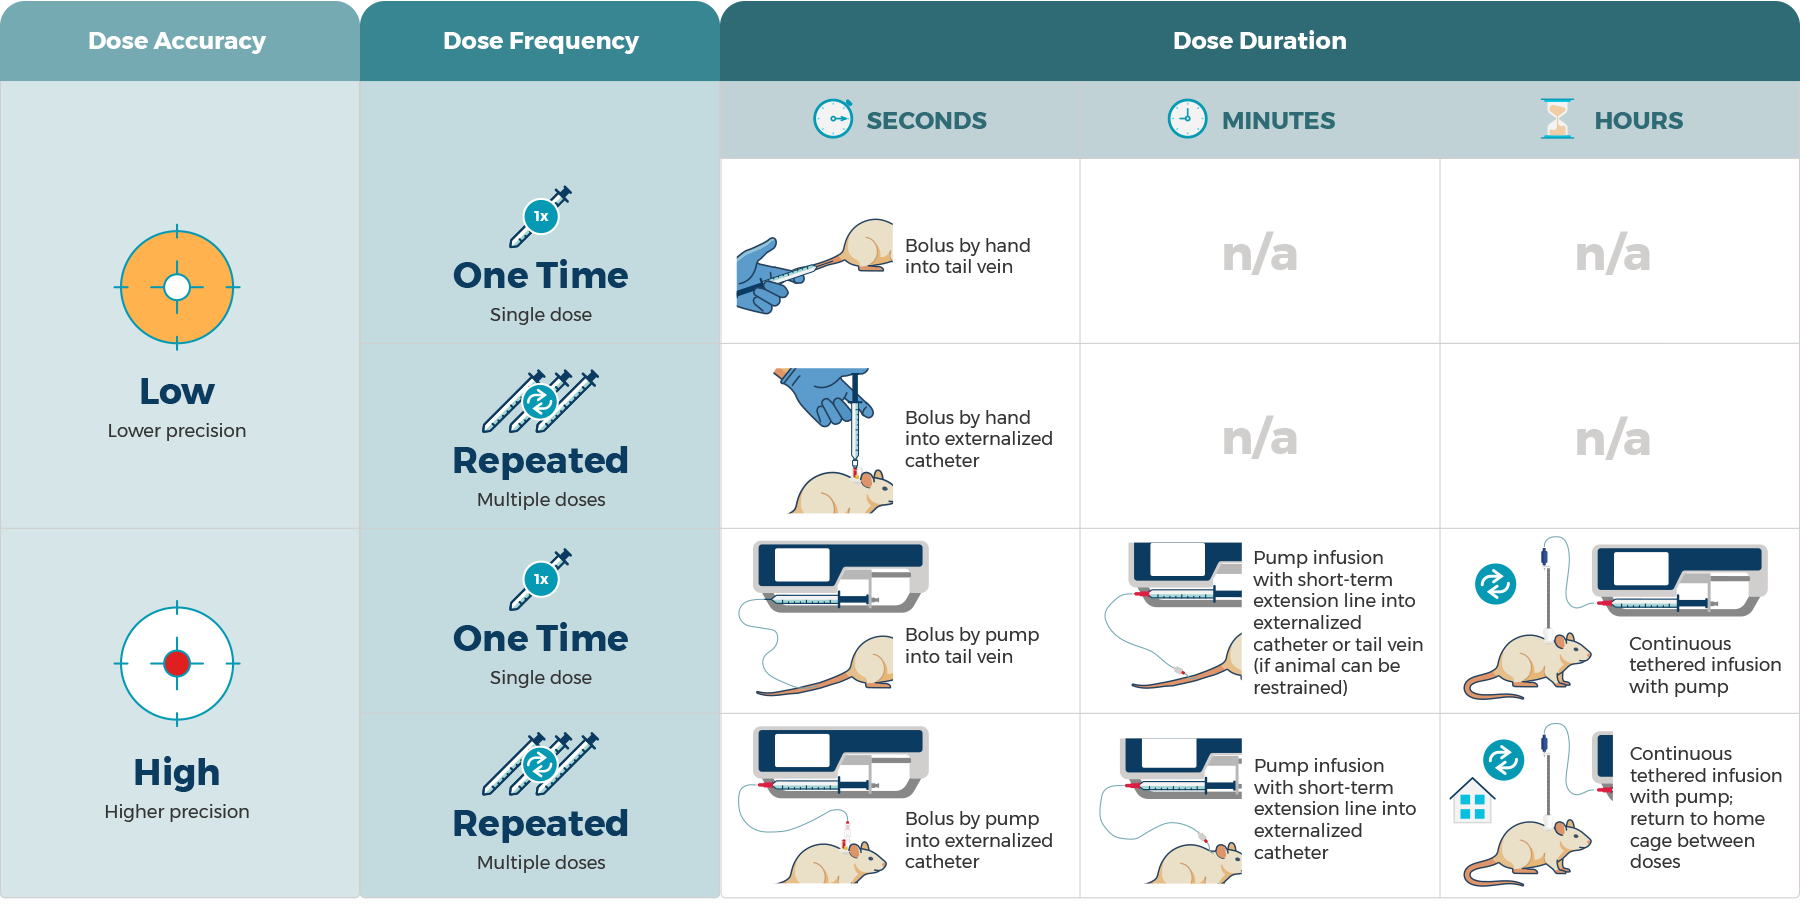
If your dose can be delivered in a single bolus over a few seconds, where an accuracy of ±10% is acceptable and no particular flow rate is specified, you can deliver it manually with a syringe.
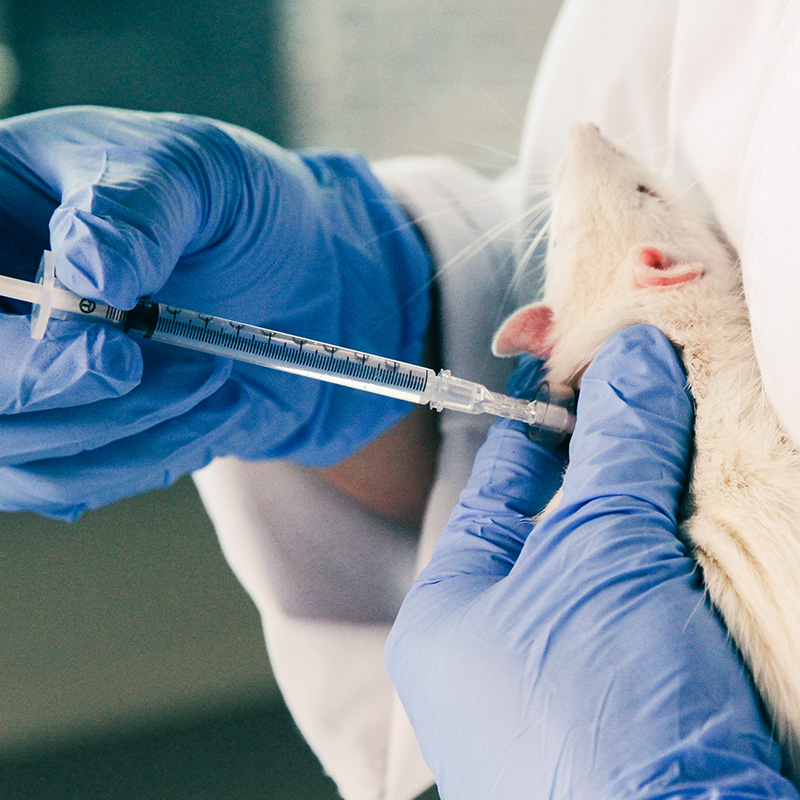
One-Time. For a single dose you can use a widely-available and inexpensive tuberculin syringe with a 27ga (or smaller) needle and infuse directly into the lateral tail vein. If tail movement makes this method difficult, you can attach a tail vein cannula - a needle with a length of tubing - for more flexibility. A butterfly needle can make handling easier. Animals can be group housed and no surgery is required, but the restraint and needlesticks will cause stress.
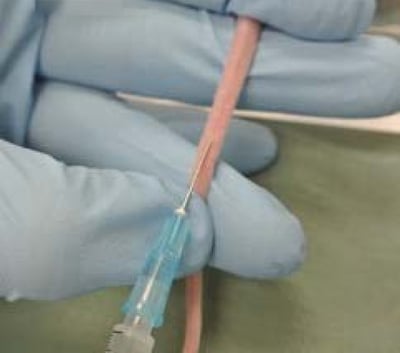
Photo courtesy of the University of British Columbia
Repeated. If you will be making repeated injections you’ll need to weigh the stress and damage to the tail that will be caused by needlesticks against the option of performing a surgery to implant a catheter. Once a catheter is implanted you can make repeated manual injections into the exteriorized port of a Vascular Access Button™ (VAB) without causing additional pain or trauma. Animals can be group housed. You will have the stress of the surgery and handling, but not needlesticks.
Dosing with a Pump
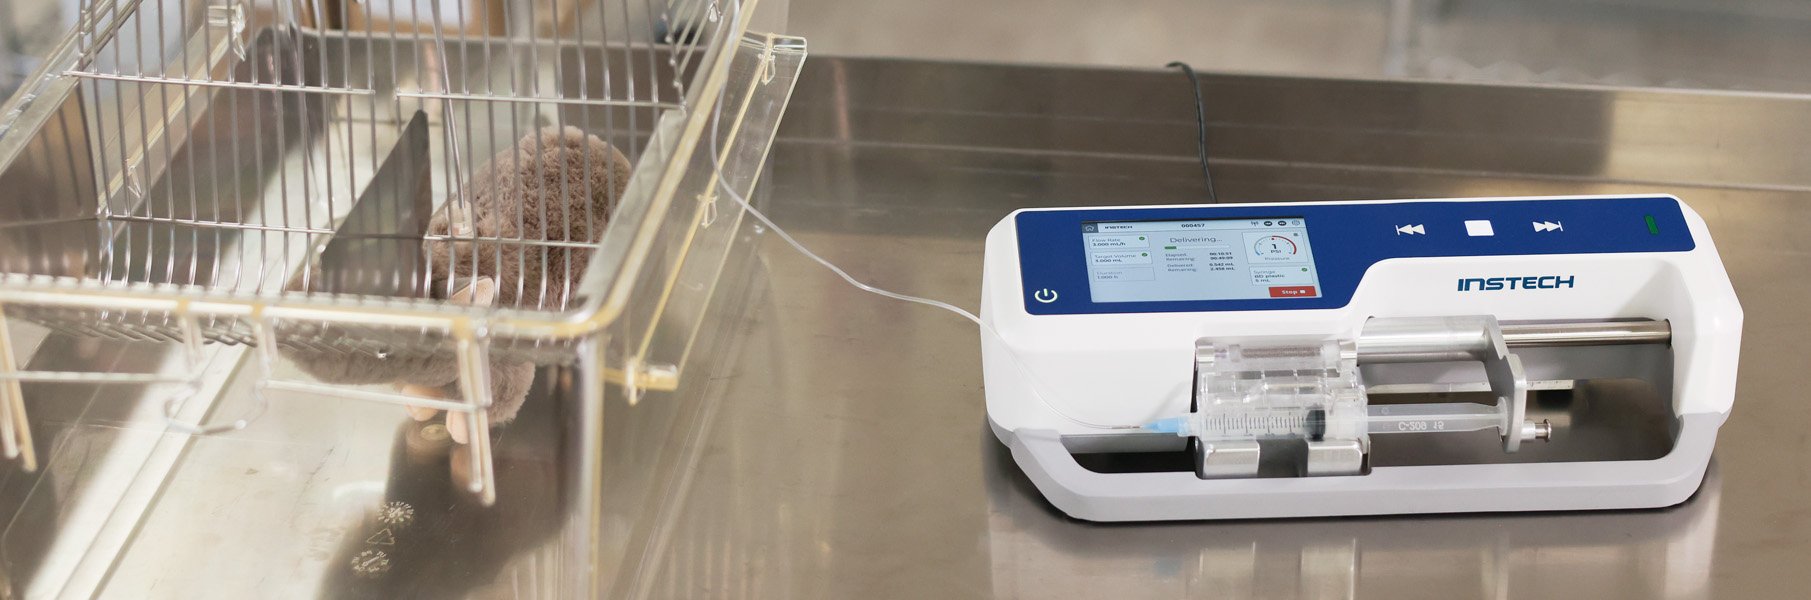
If you need to dose with an accuracy of ±5% or better, or if the flow rate and duration of the dose delivery is important, you should use a syringe pump rather than trying to dose by hand.
Bolus. For quick injections that need high accuracy you can bring the animal to the pump and otherwise use a set up that is similar to manual dosing. For one-time or infrequent doses you can use tail vein needles with a length of tubing to the pump. For repeated doses to an animal with an exteriorized catheter you can use a tubing segment between the pump and a PinPort™ connector. You’ll need to review your aseptic technique carefully to figure out which components can be reused and which must be discarded after each dose. You can use a footswitch to activate the pump so that you can have both hands free to hold the animal and dosing line.
Short-Term. For doses that are to be delivered over minutes, you have some equipment options that lie in between a simple bolus and a full tethered infusion setup. To start, you can dose your animals in groups; you do not need one pump per animal.
If the dose is one-time or infrequent, and short enough that you can restrain your animal, you may be able to access the tail vein with a flexible peripheral IV catheter attached to a pump via an extension set.
For more frequent intermittent doses you will want a catheterized animal with a Vascular Access Button™.
-
For doses of a few minutes, where restraint is appropriate, you can connect an extension set with a PinPort™ connector to the VAB™ port. You’ll want your restraint to have a slot for the VAB™.
-
You can also connect the extension set to an animal freely moving in a temporary cage. Charles River Ashland reported that there is a period of a few minutes where the animal is acclimating before they realize they can grab the tubing attached to their back. You’ll want to monitor the animal during the dose, but this can be a welfare refinement over restraint.
- If the dose is long enough that the animal might grab or bite the tubing, you will want to use a tether with a protective spring. If the dose is not long enough that you need a fluid swivel to prevent tangling - i.e. if you are confident your animals won’t be rotating more than once or twice during the dose - you can use one of Instech’s intermittent dosing tethers. These are simpler and lower cost than a full continuous infusion tether, but still allow you to snap them into a counterbalance to take the weight of the tether off the animal.
Long-Term Intermittent or Continuous. When you have a dose of longer than 15-30 minutes, where you want a freely moving animal that you do not have to monitor, you will want to move to a full tethered infusion system. These consist of:
-
Surgically implanted catheter
-
Catheter exteriorization device (eg, VAB™)
-
Tether
-
Swivel
-
Swivel mount
-
External tubing
-
Infusion pump
Once you have this system set up you can conduct continuous infusion studies that run for weeks. If you have a long intermittent doses, for example 2 hours a day for 8 weeks, you’ll have the option of (a) keeping the animals connected to a pump for the duration of the study but switching between test article and saline, or (b) dosing in groups and then returning the animals to a home cage. If you can dose in groups you will need fewer pumps and infusion cages but you may go through a large number of tethers since they should be replaced whenever sterility could be compromised.
Equipment Needed for Rodent IV Infusion
Let’s go into more detail on the equipment needed for these various approaches, which are largely based on the frequency and duration of the doses.
| Bolus | Frequent Bolus | Short-Term | Frequent Short-Term |
Long-Term/ Continuous |
|
| Needle/PIVC |  |
|
|||
| Surgically-implanted catheter | |
|
|
||
| Catheter exteriorization device | |
|
|
||
| Protective tether | |
||||
| Swivel | |
||||
| Swivel mount | |
||||
| Extension line | If using pump | If using pump | |
|
|
| Infusion pump | If needed for accuracy | If needed for accuracy | |
|
|
Needles and Peripheral IV Catheters
A syringe with needle, usually 25-30ga for tail veins (depending on model), is the simplest way to give a manual bolus dose. These are inexpensive and widely available from the clinical market. Use a new needle for each dose for sterility and for sharpness.

Image courtesy of ICU Medical
If you can use a clinical peripheral IV catheter (PIVC) you will be able to retract the sharp needle, leaving a flexible tube which will cause less trauma in the tail vein for extended doses. You can connect these to a syringe in a pump with a luer extension set. Charles River’s Ashland site reports that the 26ga SuperCath 5 from ICU Medical works well for infrequent intermittent dosing in rodents.
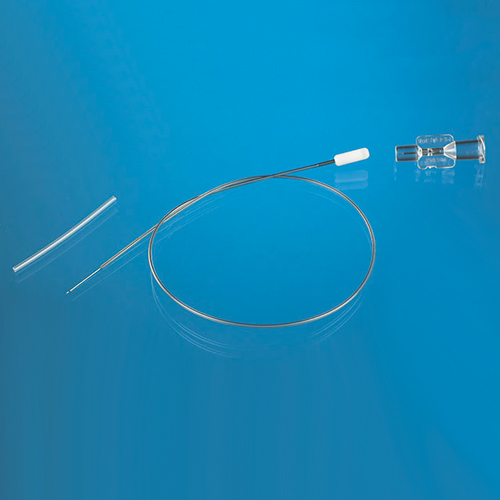
Specialized mouse and rat tail vein cannulae are available from a number of suppliers including Instech. They will have a length of tubing so that you can use a pump, needles of 25ga-30ga, and other features such as butterflies for gripping or PinPorts™ to make it easy to change out the set or the syringe.
Mouse Tail Vein Cannula
Surgically-Implanted Catheters
If your study requires an implanted catheter, the catheter itself is probably the most important component. A failure likely means dropping the animal from a study, whereas external components can be repaired or replaced. Decades ago it was common for researchers to cut lengths off of a roll of tubing and insert the tube into a vessel. If you’re still doing this, you are probably only getting patency of a few days, and you have missed out on the development of sterile finished catheters made for specific rodent species, vessels and body weights. If you’re doing everything right, you should expect bidirectional patency of 3-6 months in rats and 8-10 weeks in mice. If you are only infusing, patency can last even longer.
As we discuss in our catheterization surgery courses, optimizing patency is a combination of the surgical procedure, the equipment and post-surgical maintenance. When it comes to the catheter itself, there are five important features: material, diameter, tip shape, collars, and sterility.
Material
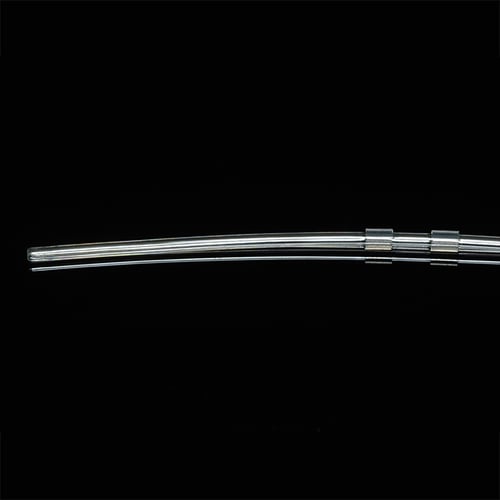
Traditionally, polyethylene (PE), silicone and polyurethane (PU) tubing have been used for rodent catheters.
Today, polyethylene is primarily used for external infusion tubing. PE has excellent compound compatibility and is not permeable to air, but its stiffness can damage vessels and it is difficult to put a round tip onto it. If you are using PE as a vascular catheter you should not expect patency of more than a few days.
Silicone tubing is inert, soft and is the one tubing material that can be autoclaved. However, it is highly gas permeable, so if any portion of this tubing is externalized you will have evaporation which will pull blood into the catheter tip and then it will clot. Silicone slips off of connectors and can puncture easily and so it is not compatible with externalization devices like the Vascular Access Button or Harness. It’s difficult to tip, expensive and can be hard to source. For all these reasons, silicone tubing is not a good material for vascular catheters.
Soft polyurethane tubing is the most common laboratory animal catheter material. It has the right balance of softness and stiffness for inserting into vessels, and if you have specialized equipment you can mold round tips onto the ends. PU’s “stretchiness” keeps it locked onto connectors, so long as there is a good fit between the inner and outer diameters and the tubing manufacturer can hold tight tolerances. This characteristic also helps hold collars in place without glue. It is somewhat permeable to air so catheters should be kept subcutaneous if possible.
Polyurethane tubing is hemocompatible and commonly used in human medicine. Occasionally a compound or vehicle will interact with PU, and in those cases you should conduct benchtop tests first to pinpoint the issue and then work with your supplier to find the next best alternative.
Diameter
A catheter’s outer diameter is historically measured by the French scale, where 3Fr=1mm. You will choose your catheter size based on the size of vessel you want to catheterize.
| Catheter Size | Common Vessels |
| 3Fr | Rat Jugular vein Rat femoral vein |
| 2Fr | Rat carotid artery Mouse jugular vein |
| 1Fr | Mouse carotid artery |
A catheter’s inner diameter is also important. The larger the inner diameter, the lower the resistance to flow. That will make it easier to infuse boluses and collect blood samples and can reduce the chances of clotting. It’s also important that the tubing inner diameter match the connectors you will be using. At Instech we have standardized on 22ga and 25ga connectors on our devices and the catheter and external tubing we use has been extruded to fit those connectors.
| Instech Catheter Size | OD | ID | Fits |
| 3Fr | 1.00mm (.040in) | 0.64mm (.025in) | 22ga |
| 2Fr | 0.69mm (.027in) | 0.43mm (.017in) | 25ga |
| 1Fr | 0.36mm (.014in) | 0.18mm (.007in) | n/a* |
*The ID of 1Fr is too small to fit on any connector, so it is provided as a two-piece catheter, stepping up to 2Fr or 3Fr for the connector.
Tip Shape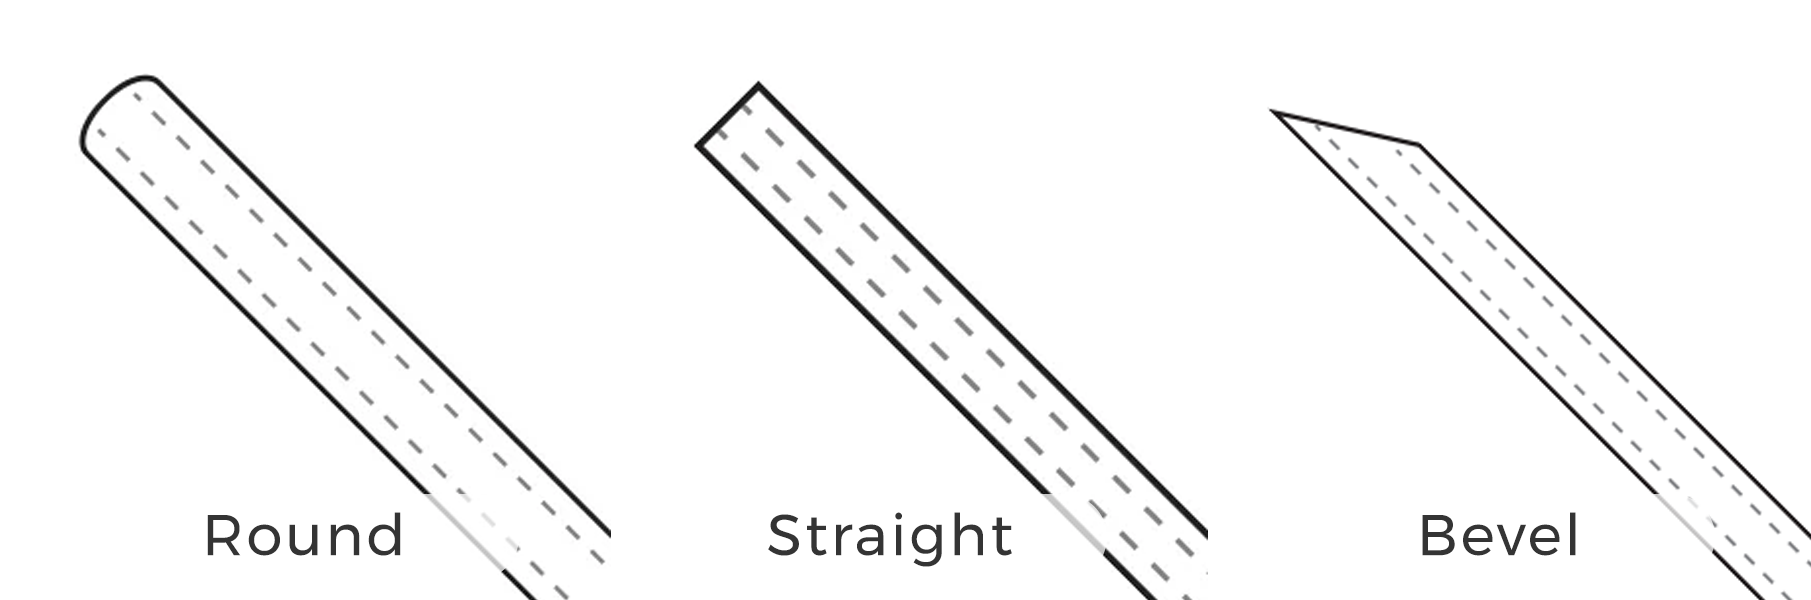
The intravascular end of the catheter is typically referred to as the “tip” or “distal tip.” Straight cut (square or blunt) or beveled tips can be made from a roll of tubing, while rounded tips require specialized tipping machines, a manufacturing step which can double the cost of a catheter.
Rounded and beveled tips can be easier to insert into the vessel. It’s thought that rounded tips cause less trauma to the vessel wall than do square or beveled tips, but whether they improve patency enough to be worth the added cost has been a matter of debate for many years. For example, in a 2025 Nature Scientific Reports article, Yamauchi et al3 reported no statistically-meaningful difference in patency between rounded and square tip mouse jugular vein catheters. However, results for both groups were poor, with only about 15% of the catheters fully-patent after 4 weeks, indicating that factors other than tip geometry were dominating the outcome. The 2021 AALAS poster presentation by Charles River’s Ashland site4 offers the most compelling evidence we have seen: in a study with 20 rats per group, 70% of round tip catheters were fully patent after 8 weeks vs 35% for blunt tip, a result that applied equally to jugular vein and femoral vein catheters.
If your study requires patency of more than a week or two, particularly for blood sampling, round-tip catheters are at a minimum a good investment, if not a requirement.
Collars
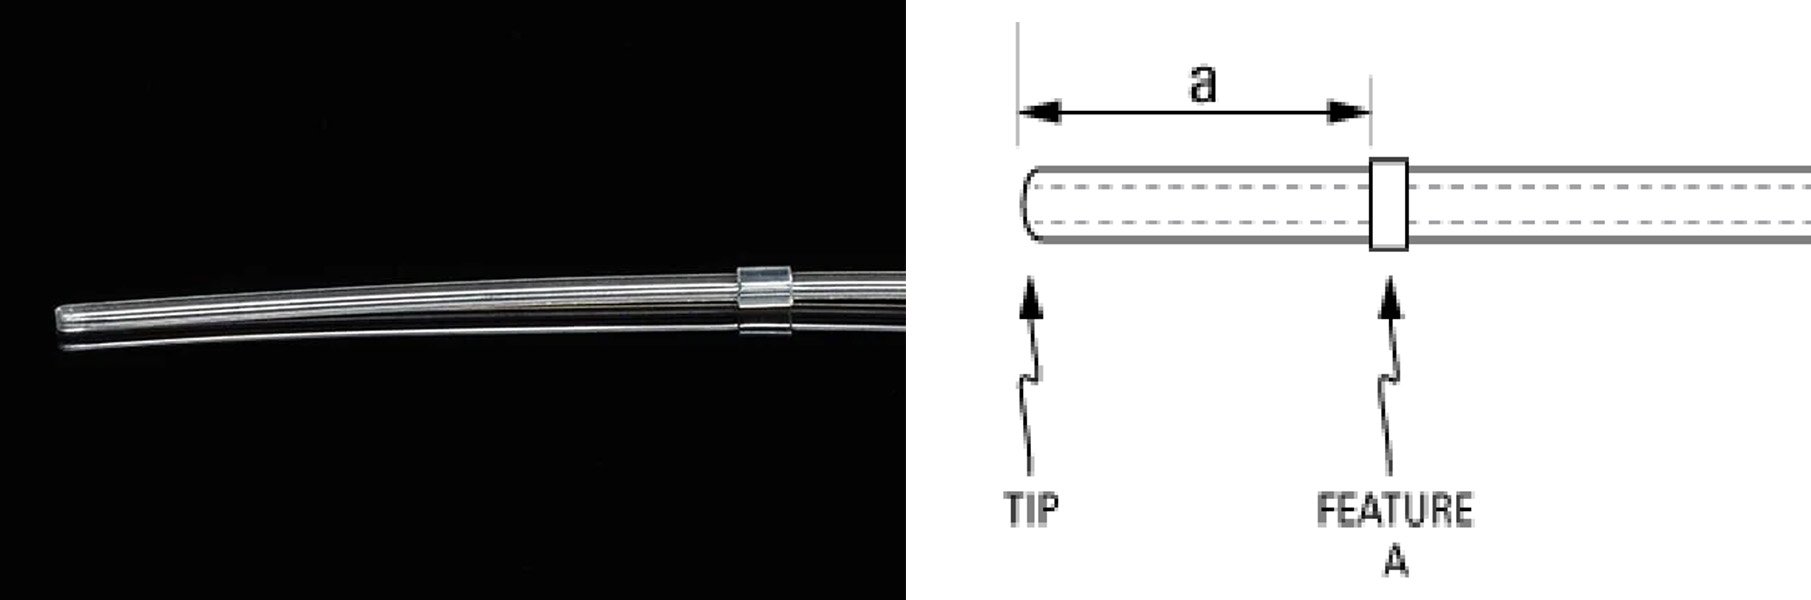
Placing your catheter tip in the correct position in the vessel may be the most important surgical factor affecting patency. You can do everything else right, but if you are off by a millimeter or two it can mean the difference between patency of a day or two vs many weeks. We cover the optimal tip locations in our surgical training courses. In order to get a consistent tip position you need a consistent landmark for your insertion point, and then a catheter with a collar or bead at a consistent distance from the tip which will determine your insertion length. At Instech we call them “collars” because they are made from a small segment of tubing, usually silicone, which fits tightly around the main catheter tube. They are often called “beads” because some catheter manufacturers create them with a bead of glue around the tube.
Collars can be fixed in place with glue, or left moveable. Movable collars allow a surgeon to adjust the insertion length for animals of different sizes. Ideally a movable collar is still tight enough that it will not move once the catheter is secured in place. As a surgeon you must be careful that the step of adjusting the collar does not compromise sterility. A fixed catheter will give you assurance that it will not migrate over time, but if your SOP calls for different insertion lengths based on body weights, as most do, you will need to stock a range of catheter models.
Sterility
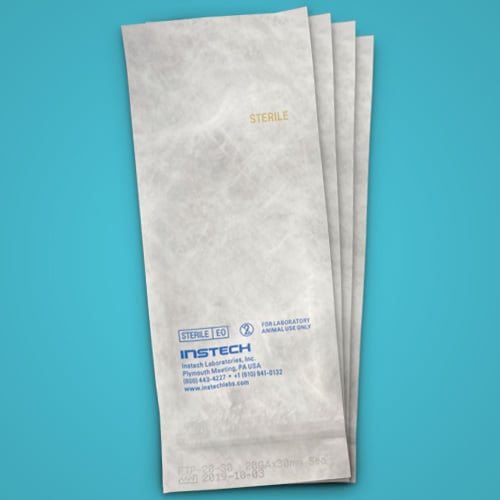
If you are implanting catheters which are not sterile—perhaps you are making them in house from a roll of tubing— you are violating one of the most basic principles of surgery. Plastic tubing is difficult to sterilize; autoclaving will melt most plastics, and VHP may not penetrate the entire fluid path. Ethylene oxide gas sterilization is typically the only option, and this is not available in many institutions. Prior to sterilization, catheter assembly should be done in a clean room or under a hood and with the assembler wearing proper PPE including gloves.
If you do not have the perfect set up to manufacture catheters in your facility, your best option is to purchase finished, sterile rodent catheters from a reputable supplier.
Catheter Exteriorization Devices
An implanted catheter without an exteriorization device is the least useful. You may be able to inject or take a blood sample, but you will not be able to connect to a pump, group house, access to the catheter will be limited, and your animal may be able to reach it.
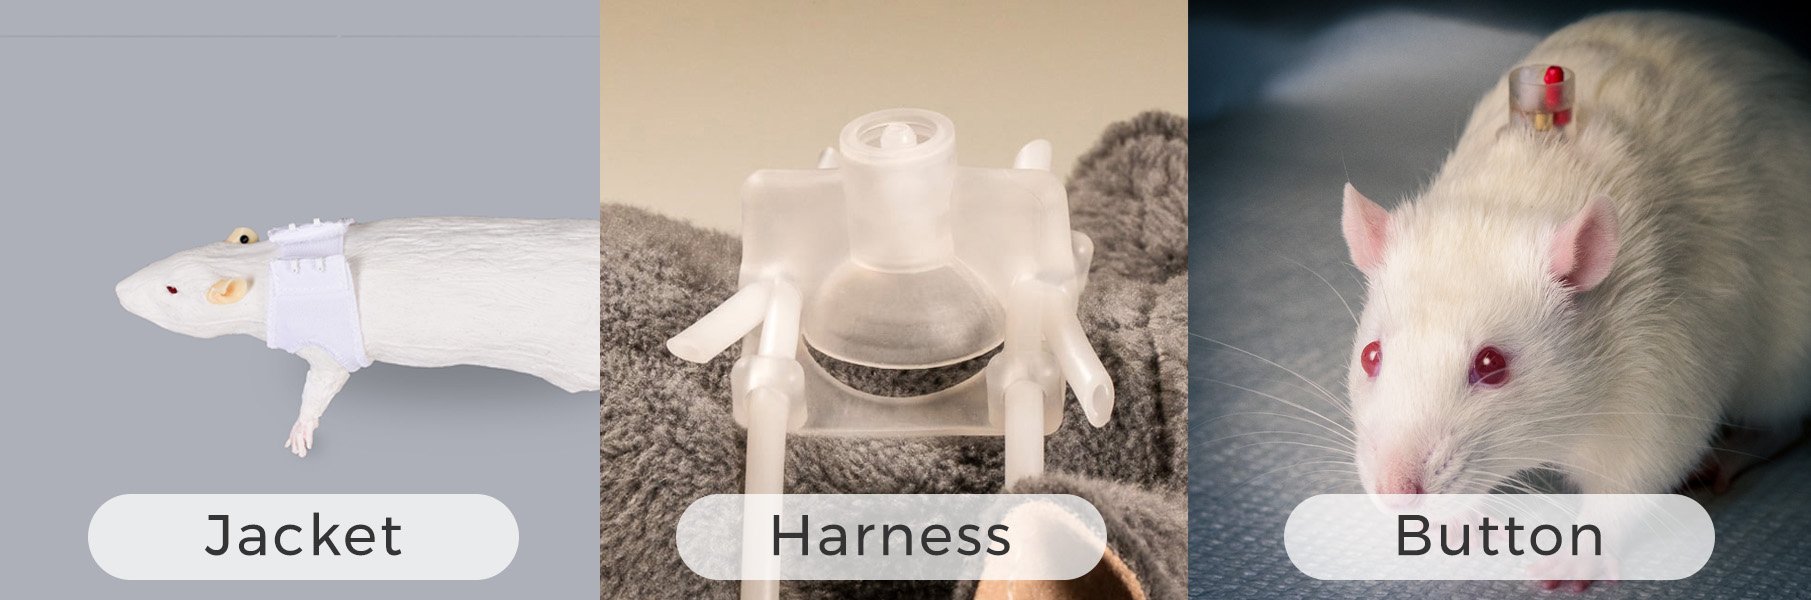
Historically, if you needed continuous access to a rodent catheter you would exteriorize a long segment of the catheter and thread it through a protective spring tether up to a fluid swivel. The spring would be connected to the animal with a harness, jacket or open-lumen skin button. You either needed to connect the catheter to a pump right after surgery, complicating the recovery, or leave a plugged catheter under the skin and then perform an awkward connection to a longer tube when you were ready to infuse. Once connected to a pump, disconnection was difficult, and you needed to keep fluid flowing at all times to prevent clots. Most critically, these were open systems – tubing connections and disconnections would allow air and bacteria into the fluid path, which would compromise animal health and catheter patency.
In 2006, Instech developed a harness with a built-in port that solved many of these issues. It was the first closed system for tethering rodents: the catheter would be attached to the port in the harness during surgery, and then all subsequent access, whether with a syringe or and infusion tether, involved a connection which punctured the silicone septum of the port. Ease-of-use and patency duration improved dramatically. For the first time, researchers could order animals that would arrive from surgical service vendors with the harness installed and ready to be put on study. Still, this system had drawbacks. Rats tolerated the harnesses fairly well, but mice did not. The belly bands needed to be checked frequently and adjusted to avoid chaffing. Animals could not be group housed. And the catheter connection under the harness dome meant that a few centimeters of the catheter was exposed to air. Over time, fluid could evaporate through the catheter walls, pulling blood into the catheter tip and causing an occlusion.
In 2012, Instech moved the port over into a transcutaneous skin button to create the Vascular Access Button™, or VAB™. This solved the remaining issues. The catheter is fully subcutaneous to prevent evaporation. You can place a protective metal cap over the button to group house animals. Tissue will encapsulate the surgical mesh for long-term implantation. And, working with the Jackson Laboratory, Instech developed several versions of the button that are well tolerated by mice.
Originally developed for rat IV self-administration, where studies can run for months and animals are moved in and out of operant chambers, the VAB™ quickly spread to other applications. Pharmacokinetics departments, where workload can vary from week to week, are maintaining a colony of catheterized animals for blood sampling without fear of losing patency. Some even reuse animals after a wash out period, a 3Rs reduction. A pharmaceutical company was able to grow tumors for several weeks in catheterized mice and then start an infusion study. Duke University was able to run long-term IV self-administration studies in mice for the first time.5 Over 20 posters and papers have helped the VAB™ become the standard exteriorization device for rats and mice, and several companies have attempted to copy it.
Protective Tethers
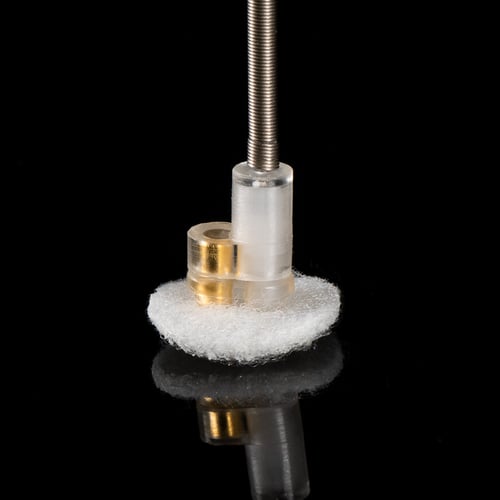
Mouse One Channel Vascular Access Button with Tether
When you need to connect an infusion line to a freely-moving rodent you will use a flexible length of stainless steel spring to protect the tubing inside from biting and to transmit torque from the rotating animal to a fluid swivel mounted outside the cage. This spring and tubing combination is called a “tether” by most researchers other than those in the IV self-administration world who refer to them as “leashes.” A tether typically has a connector that mates with the catheter exteriorization device on one end and fits onto a swivel at the other.
Defining characteristics of a spring tether are its length, inner and outer diameters, and wire diameter.
| Length | Inner Diameter | Outer Diameter | Wire Diameter | |
| Standard rat tether spring | 30cm | 2.36mm | 3.18mm | 0.41mm |
| Standard mouse tether spring | 18cm | 1.65mm | 2.15mm | 0.25mm |
The length of a spring must match the dimensions of the cage and swivel set up. There should be minimal slack at any spot in the animal's range of motion, otherwise the animal could bite the tether and eventually sever the tubing. Likewise the tether must be long enough that the animal has free range of movement throughout its cage. A counter-balanced swivel arm is usually needed to make both possible. There are limits to how long a tether can be and still transmit torque to the swivel; for standard mouse tether spring this is about 30cm, and for rats 60cm.
The inner diameter of the tether will determine how many lines can run through it. For example, on our 3 and 4 channel rat tethers we move up to a larger diameter spring.
The outer diameter of the spring determines the fit with swivels and tether connectors. The outer diameter = inner diameter + 2 x wire diameter.
The wire diameter, or “heaviness” of the spring, will determine its resistance to biting. Heavier spring does have drawbacks since it will place greater forces on the surgical site of a button and may restrict movement; if possible, solve biting issues by optimizing tether length and counterbalancing instead - that is, don’t give the animal an opportunity to bite it.
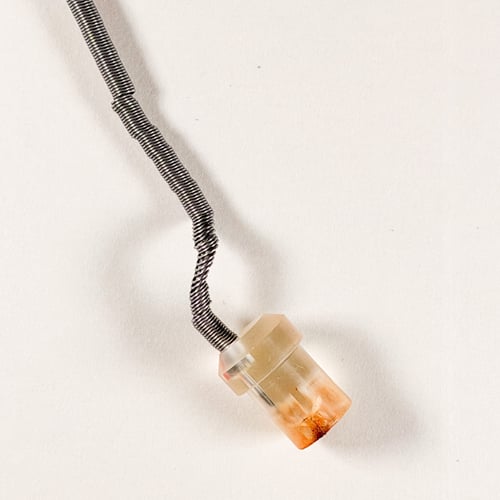
If your tethers look like this you have a problem with biting, swivels not turning properly, or both.
Swivels
375/D/25LT Low Torque Dual Channel Swivel
The fluid swivel is a component that is unique to laboratory animal research. Humans don’t usually turn in circles when they are connected to an infusion pump, but rodents are not so cooperative. A swivel lets the animal and tether rotate while the infusion pump outside the cage remains stationary. You will need them for any dose of an unrestrained animal of more than a few minutes, enough time that the lines might get twisted.
The primary features of a swivel are its construction, number of channels and channel size (or gauge).
Stainless Steel or Plastic Construction
Stainless steel swivels can be cleaned, resterilized and reused. Swivels with plastic bodies are difficult to resterilize since they can’t be autoclaved, but the reduced cost compared to stainless steel swivels makes discarding them at the end of a study a reasonable option. Plastic swivels can be built into a complete infusion kit, with lines from pump to animal, and sterilized as a whole, avoiding assembly which could compromise sterility. Use plastic swivels and infusion lines in studies where proving the success of the cleaning and sterilization procedure would be more costly than replacing the equipment.
Number of Channels
One channel swivels are most common; they will let you infuse or sample through a single continuous connection to an external pump or sampler. You can add a second or even third channel for intermittent access by having a port at the top of the spring tether, but these lines will rotate with the animal and cannot be connected to a pump or other device.
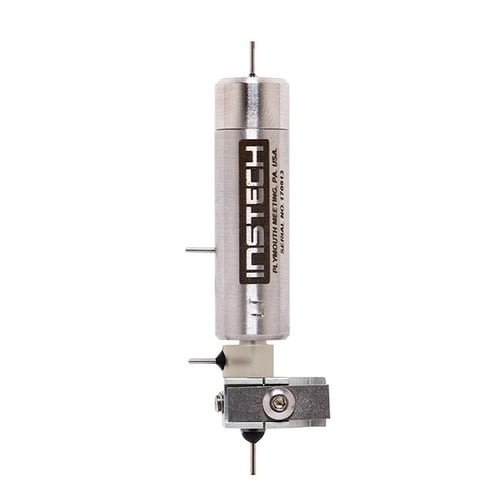
Low-torque dual channel stainless steel swivel
For two continuous fluid lines, for infusion plus continuous sampling, for infusion of two independent compounds, or for bile sampling and replacement, you will need a two-channel swivel. Due to the complexity of the seals these are made in stainless steel only.
You cannot create a two-channel swivel by using two one-channel swivels; the lines will tangle.
Channel Gauge
The size of the inlet and outlets on the swivel will determine what kind of tubing you can connect to it. 22ga connectors are common for rat infusion; 22ga has an outer diameter of 0.71mm which connects well to tubing with inner diameters of 0.60-0.64mm. 25g connectors are common with mouse infusion and multi-channel rat infusion; the OD of 25ga is 0.51mm which connects well with tubing that has IDs of 0.41-0.43mm.
With single-channel swivels, the size of the channel determines the torque required to turn it, since the seals work on the outer diameter of the channel tubing. Rats have no problem turning 22ga single channel swivels, but mice can struggle. Neither have a problem turning 25ga swivels.
This relationship breaks down with two-channel swivels since there are two sets of concentric seals. Only rats can turn standard two-channel swivels; mice require specialized low-torque models.
Microdialysis Swivels
Special two-channel swivels have been developed for the technique of microdialysis on freely-moving rodents. These have inner diameters of 0.15mm for the very low flow rates of the dialysate, and they are lined with quartz tubing since neurotransmitters can interact with stainless steel.
Swivel Performance
A properly performing swivel should do two things: (a) not leak and (b) rotate freely when the animal moves. If you are experiencing either of these, contact your vendor for support.
Swivel Mounts
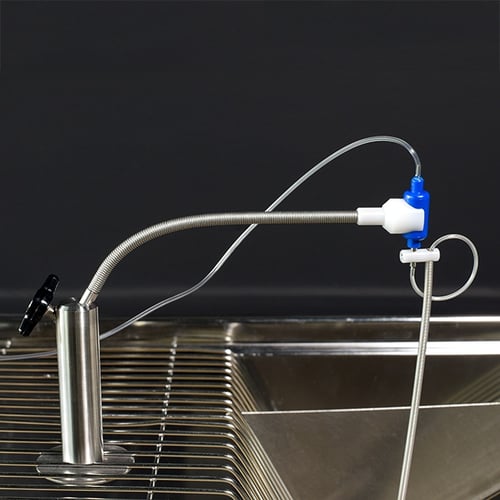
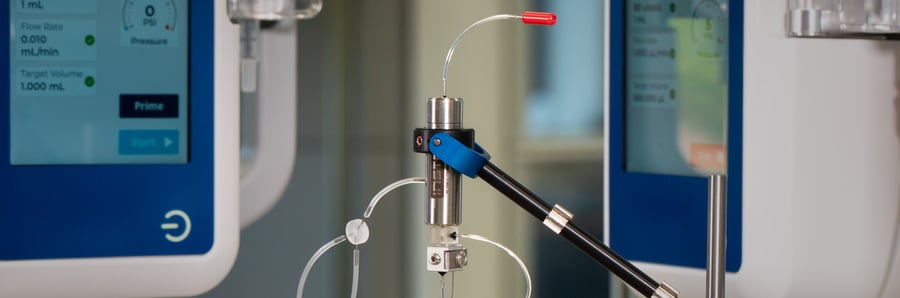
A properly mounted swivel is a critical but often overlooked component of a rodent infusion system. As discussed above, the tether should be able to reach all corners of the cage without obstruction, and when the animal is in the middle of the cage the mount should adjust to take up slack in the tether. You will usually need to cut a slot in the cage top for it to work properly.
Rugged spring-based mounts are available for rats. These can go through cage washers and have a snap-in connector so that you can remove the swivel and tether with one hand. For mouse infusion you will need a more delicate and responsive lever arm.
Extension Lines

For the tubing segment that runs between the swivel and the pump, you are typically trying to:
-
Avoid kinking, leaks, punctures or unwanted disconnections
-
Avoid evaporation through the tube wall
-
Minimize dead volume
-
Find an optimal length that gives you flexibility when accessing the animal, but is not so long that it might get snagged by a researcher or grabbed and bitten by the animal (the line in the swivel mount photo above is at risk of this)
- Follow aseptic technique when connecting.
At Instech, our standard extension line is a 60cm co-extruded PE/PVC tube, bonded to the swivel on one end and the luer on the other to prevent disconnections, and sterilized as an entire kit with the swivel and tether.
Plain polyethylene tubing is commonly used as well, but it can kink and it cannot be bonded for a secure connection. Polyurethane tubing is often used inside the spring tethers because it stretches with the animal’s movement, but air will permeate through this tubing slowly which may be an issue if you have low flow rates or static periods in between boluses.
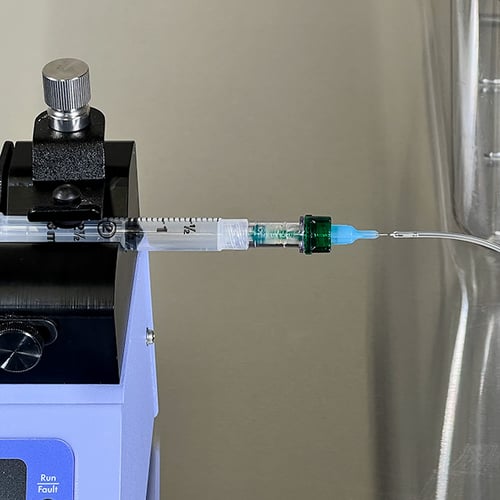
Extension sets with luer fittings are sometimes used for segments that need to be replaced occasionally, but the luers will increase dead volume substantially. If you do need to connect and disconnect at the syringe, consider a needlefree luer port such as a Rymed connector to keep your system closed to air and bacteria.
Infusion Pumps
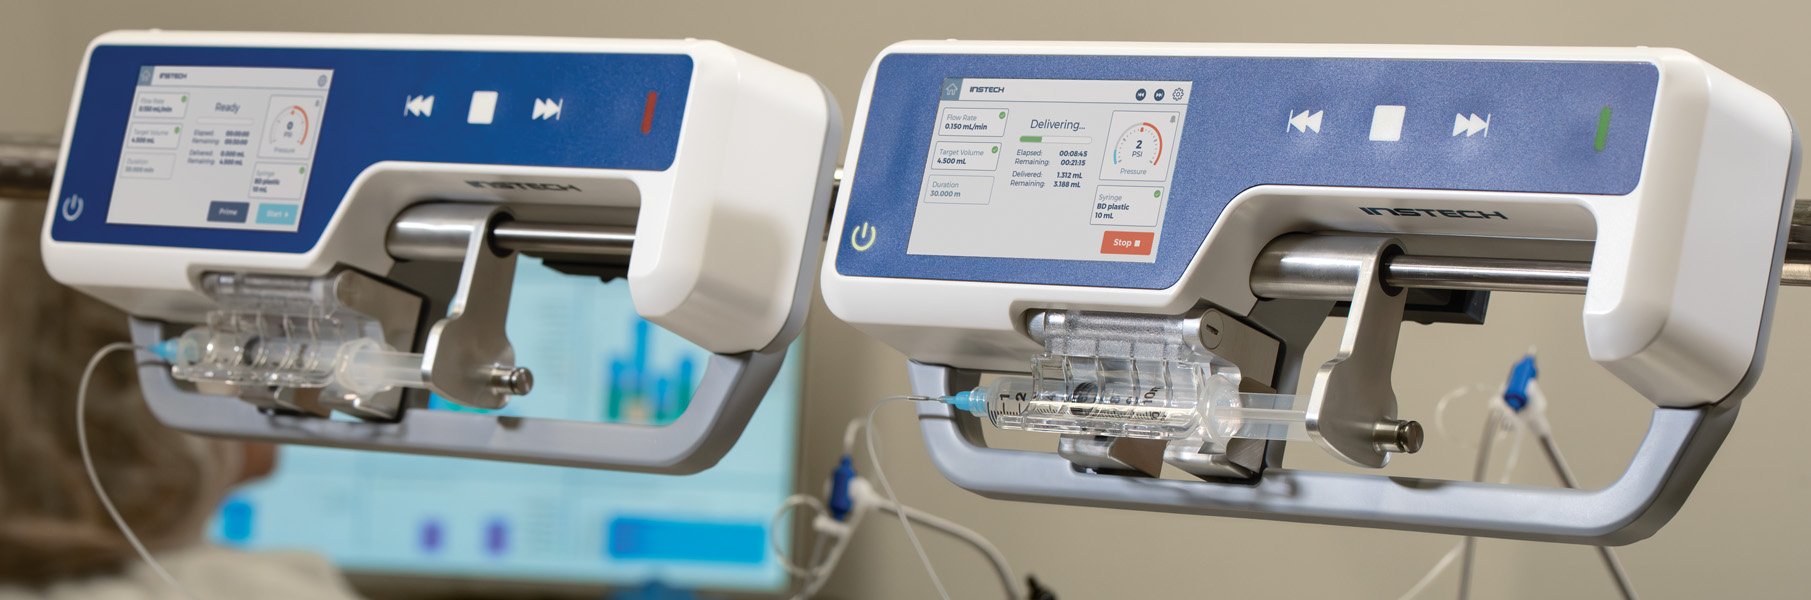
If your dose cannot be accurately delivered by hand, either due to timing or the volume, you will need an infusion pump. In hospitals, most human IV doses are delivered by “large volume” pumps: linear peristaltic pumps that pull from an IV bag into which medication has been injected. This type of pump cannot deliver the low flow rates and small volumes that are needed for rodent infusion studies; therefore, most rodent studies rely on syringe pumps.
Historically there have been two main types of syringe pumps:
-
Industrial syringe pumps, such as those made by Harvard Apparatus, KDScientific, New Era Pump Systems, Chemyx, Razel/Med Associates and others. Mechanically, these pumps are simple: they have a motor, a lead screw and a block that pushes on the syringe plunger as the motor rotates. If built right they can be highly accurate, they can infuse at very low flow rates and their simplicity leads to high reliability. The downside of these designs is that they are “dumb” pumps—they have no sensors to detect occlusions, what size syringe is installed, or if a syringe is even present at all. This adds unnecessary risk to animal safety and data quality.
-
Medical syringe pumps, such as those made by Baxter, Medfusion, B. Braun, ABC (OrchesTA) and others. Human medicine does not tolerate the risk created by industrial pumps, so all have sensors for occlusions, syringe detection and more. Most laboratories that run critical rodent infusion studies, such as GLP toxicology studies for drug approval submissions, have realized that the dosing uncertainty and animal welfare risk created by industrial pumps are not acceptable either, and so most use clinical pumps. But there are downsides to these pumps as well. They are designed for human flow rates, typically in mL/min or mL/h, not µL/min or µL/h as is needed in many small animal studies. They can be overly complex, particularly newer models with drug libraries and integration with hospital information systems. Some labs cling to older hospital pumps with simpler designs, but most of those models are now obsolete or near the end of their life, making them difficult to service or replace.
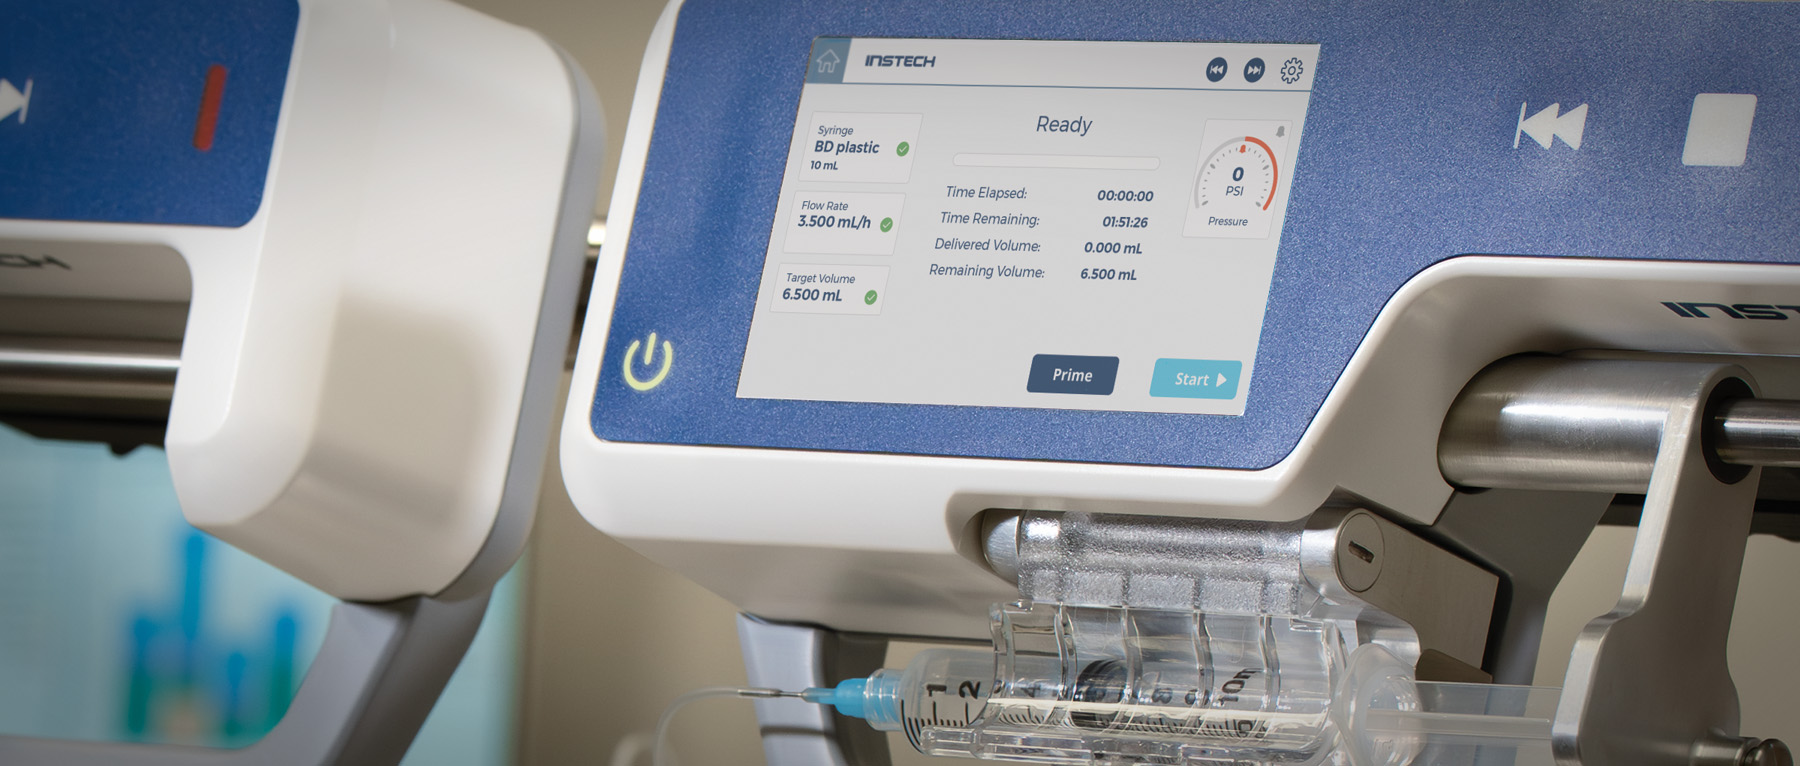
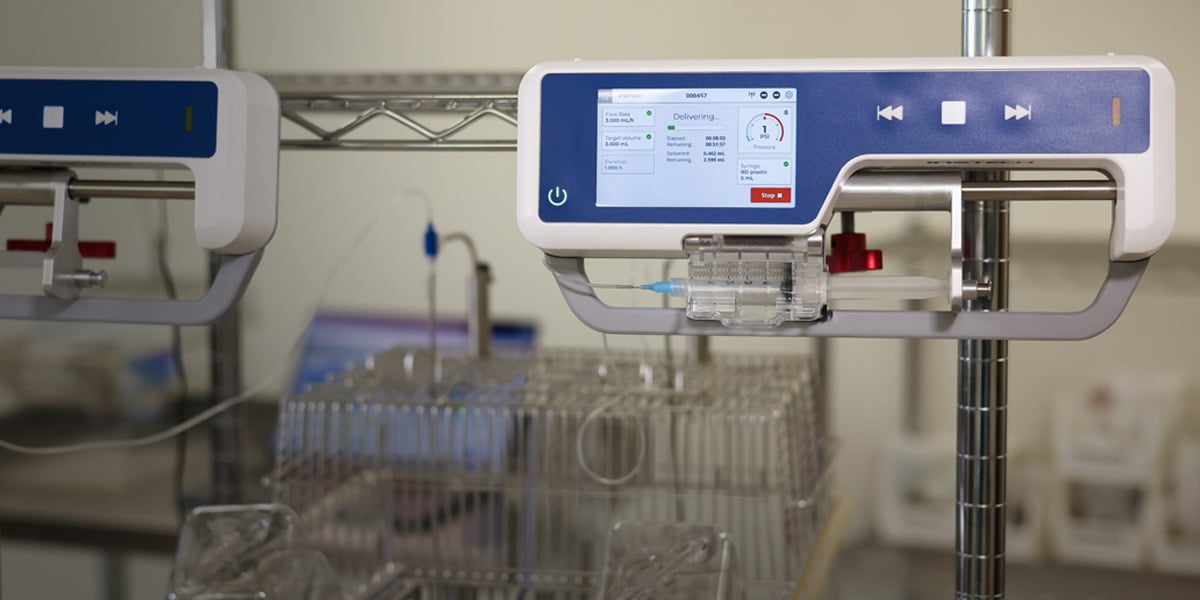
Instech has recently released a new pump for lab animal infusion, the Model 400, that has the simplicity, low flow rates and accuracy of an industrial pump, but the safety features of a clinical pump—the benefits of both, without the downsides. For more on syringe pumps, read our Guide to Understanding Syringe Pumps in Preclinical Infusion Studies.
Extra Credit: Blood Sampling During Infusion
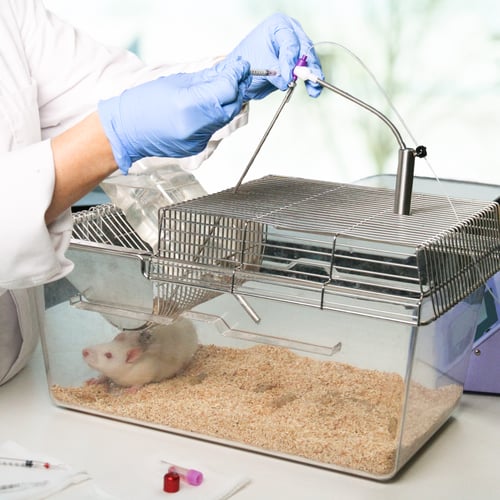
If you need to collect blood samples during an infusion study, consider placing a second catheter so that you can collect samples outside the cage, without touching the animal at all. While collecting with a needle from the tail vein, jugular or other sites might be relatively simple and wouldn’t justify a catheterization surgery on its own, adding a second line during the surgery you’ll already be performing for the infusion line is a minimal burden. You’ll then avoid the stress of handling and the needlesticks, which is easier on the animal and the technician.
More Information
For more information on the systems discussed in this post, including part numbers and pricing, see: Applications | IV Drug Infusion.
References
1Healing, G., & Smith, D. (Eds.). (2000). Handbook of pre-clinical continuous intravenous infusion. Taylor & Francis.
2Nolan, T., Loughnane, M., & Jacobson, A. (2004, September/October). Tethered infusion and withdrawal in laboratory animals. Animal Lab News.
3Yamauchi, S., Ecoff, K., Gurau, A. et al. Implantation of a vascular access button in mice. Sci Rep 15, 36627 (2025). https://doi.org/10.1038/s41598-025-20542-4
4Evans, A., et al (2021). Comparison of Catheter Tip Style, Placement, Locking Solutions and the Influence on Catheter Patency in Sprague Dawley (SD) Rats, AALAS P303.
5Slosky, L.M., Pires, A., Bai, Y. et al. Establishment of multi-stage intravenous self-administration paradigms in mice. Sci Rep 12, 21422 (2022). https://doi.org/10.1038/s41598-022-24740-2